How to Light an Interior Without Killing It
The single most common mistake in interior photography is over-lighting. A designer spends months calibrating the ambient light of a room, the warmth of a pendant, the way afternoon sun cuts across a concrete wall at a specific angle. Then a photographer arrives with a battery of strobes and replaces all of that with a flat, even wash that makes the space look like a showroom.
The brief I set myself on every interior shoot is simple: preserve what the designer intended. That means arriving at the space before I photograph it. I walk the rooms, I look at what the light does at different times of day, and I build my shoot schedule around those moments rather than fighting them.
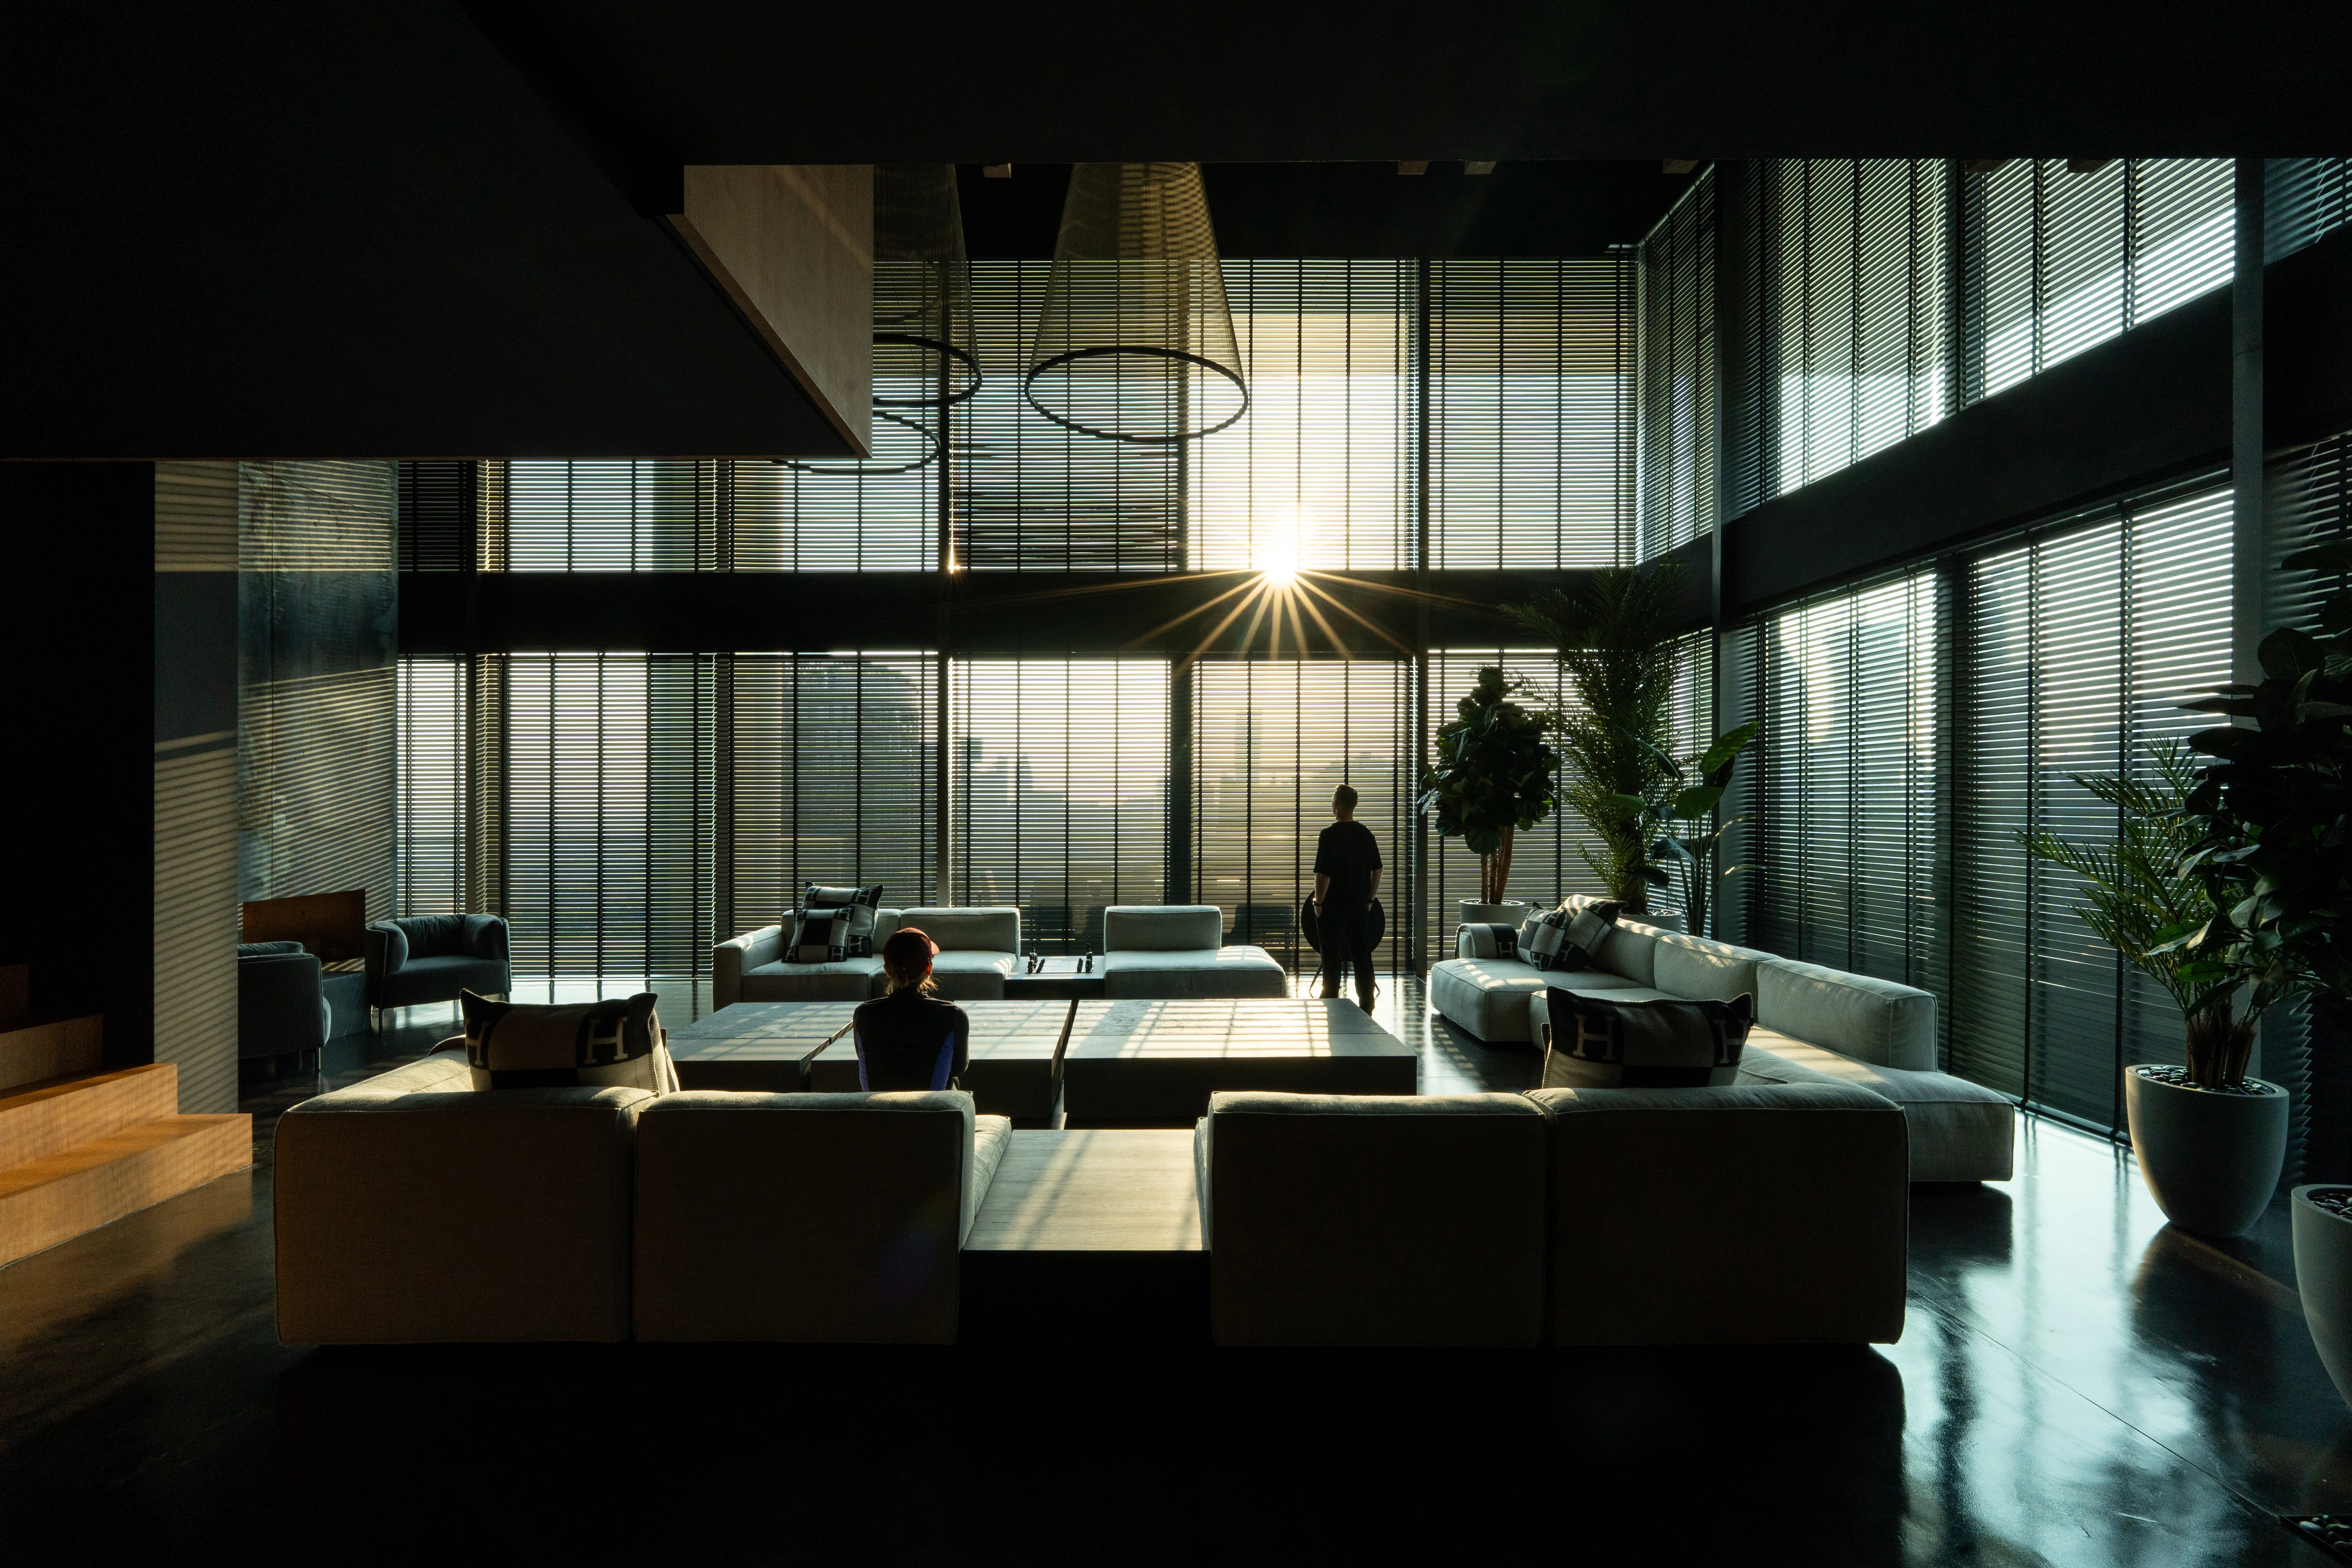
For a penthouse project like Noir Matière at Lana Residences, the materials were the story. Polished concrete, blackened oak, oxidized steel. These surfaces only read correctly under directional light. Flat light removes their depth entirely. So the approach was to shoot in available light, supplemented with very small and very controlled artificial sources placed to mimic what natural light would do at an adjacent angle.
When I do use artificial light in interiors, the rule is that it should be invisible. No spill, no hotspots, no shadows that don't belong to the architecture. The test I use: if the client cannot tell that a light was used, the image is working. If they see the light, it means the light is competing with the space rather than serving it.
This approach takes more time. It requires patience with weather, with the position of the sun, with building management. But the results are images that feel like the space rather than images of the space. That distinction is what separates architecture photography from real estate photography, and it is the only standard worth working to.
For anyone starting out, the practical advice is this: go to the space before the shoot. Turn every light in the building on and off independently. Photograph the same corner at three different times of day. By the time the actual shoot arrives, you should already know every image you are going to make.